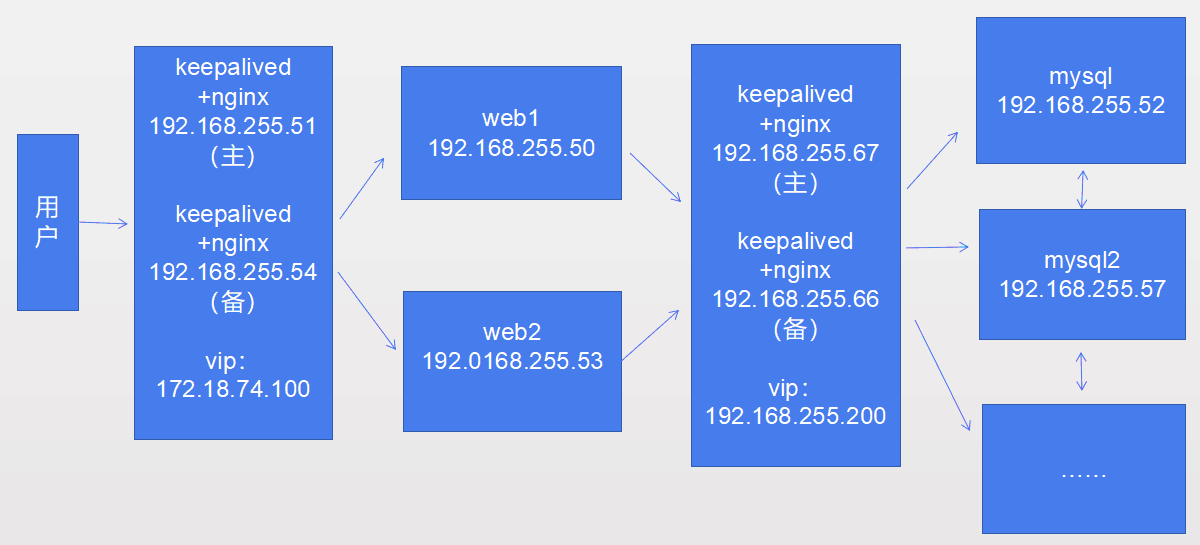
整个集群的架构如下图,服务器是exsi虚拟化。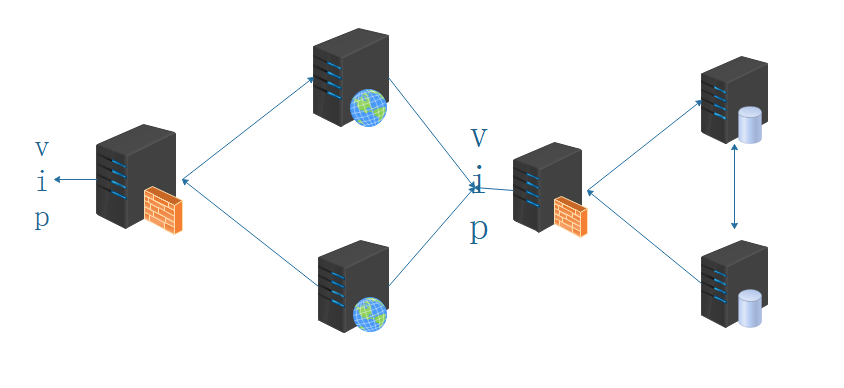
一、Firewall
在集群的配置过程中,我们的Firewall和SElinux是一直处于关闭的,感觉还是先配置上比较方便,说来惭愧 SElinux我不会(setenforce 0),在这里我就只打开Firewall了。
- 第一层Nginx监听的是80端口(也可以自定义),再将请求反向代理到web服务器的80端口(也可以自定义) ,所以他们都需要在Firewall上允许80端口的流量通过,即:
1 | firewall-cmd --zone=public --add-port=80/tcp |
- nginx高可用实现依靠的keepalived是以VRRP为基础,keepalived官方文档给出的组播地址是224.0.0.18,所以第一层和第三层的nginx的服务器上都需要在防火墙上允许vrrp组播的通过,即:
1 | firewall-cmd --direct --permanent --add-rule ipv4 filter INPUT 0 \ |
- MySQL集群必然要开启3306端口,第三层的Nginx也是在监听3306端口,即:
1 | firewall-cmd --zone=public --add-port=3306/tcp |
建议先看第五步网络存储挂载。
二、nginx高可用集群
nginx version: nginx/1.14.0,keepalived-2.0.7
编译安装nginx
wget http://www.zlib.net/zlib-1.2.11.tar.gz
wget https://jaist.dl.sourceforge.net/project/pcre/pcre/8.41/pcre-8.41.tar.gz
wget https://www.openssl.org/source/openssl-1.0.2o.tar.gz
wget http://labs.frickle.com/files/ngx_cache_purge-2.3.tar.gz
wget http://nginx.org/download/nginx-1.14.0.tar.gz
tar xvf …… 解压缩
1 | cd nginx-1.14.0.tar.gz |
配置nginx.conf
1 | #user nobody; |
nginx负载均衡功能实现依靠upstream模块,upstream模块应放于nginx.conf配置的http{}标签内,支持五种分配方式,轮询(默认)、weight、ip_hash三种原生方式,以及fair、url_hash两种第三方支持的方式。我用的是weight方式。
1 | proxy_pass http://backend; |
访问的是nginx服务器的地址即起到了反向代理的作用,代理web
接下来安装keepalive实现nginx集群的高可用。
编译安装keepalived
1 | cd keepalived-2.0.7 |
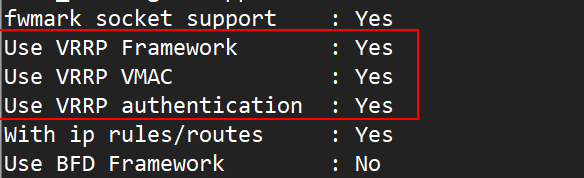
生成Makefile时有如下报错,需要另外安装libnl/libnl-3以支持IPv6,此处确实用不到,VRRP功能开启即可

配置keepalived
1 | ! Configuration File for keepalived |
keepalived是集群管理中保证集群高可用的一个服务软件,其功能类似于heartbeat,用来防止单点故障。
以VRRP协议为实现基础,可以认为是实现路由器高可用的协议,即将N台提供相同功能的路由器组成一个路由器组,这个组里面有一个master和多个backup,master上面有一个对外提供服务的vip(该路由器所在局域网内其他机器的默认路由为该vip),master会发组播,当backup收不到vrrp包时就认为master宕掉了,这时就需要根据VRRP的优先级来选举一个backup当master。这样的话就可以保证路由器的高可用了。
1 | nginx_check.sh如下: |
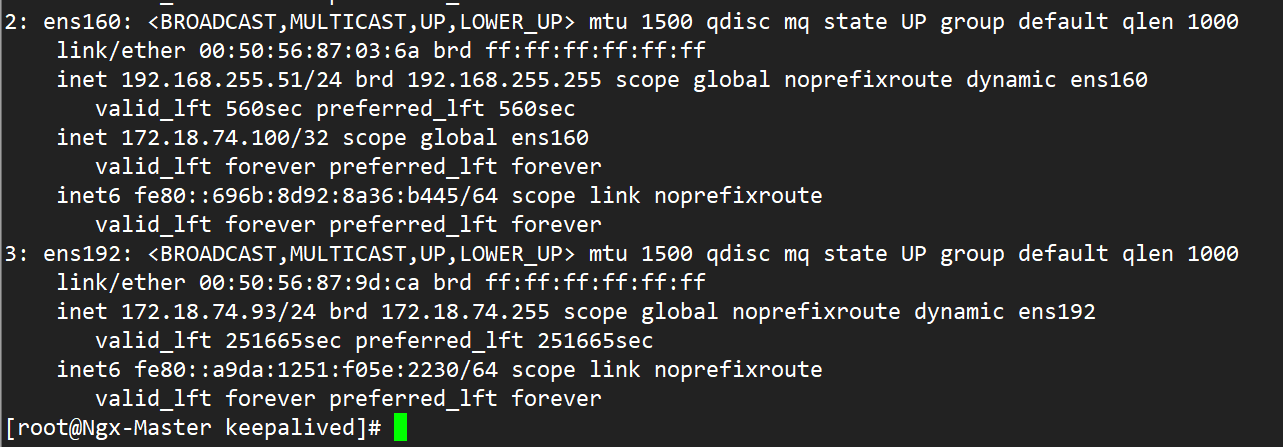
配置完成后Ngx-Master:
Ngx-Backup: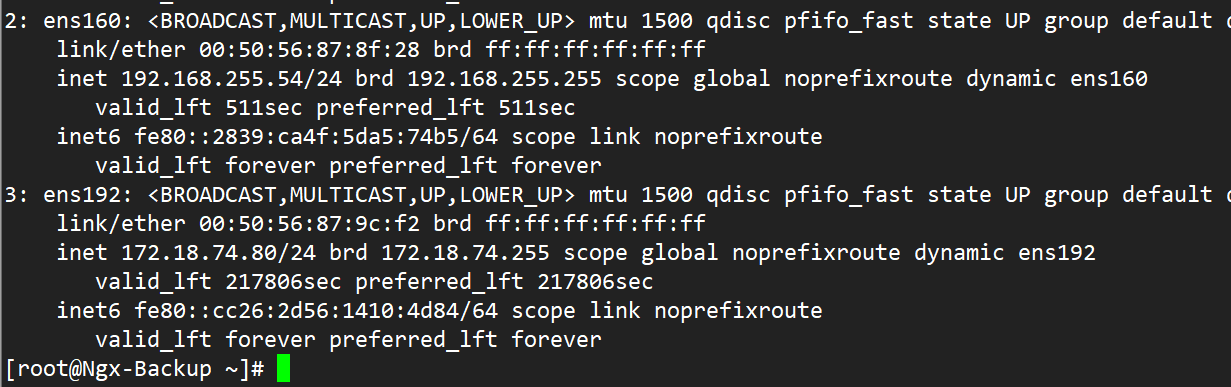
宕掉Master的网卡,vip直接转移到了Backup上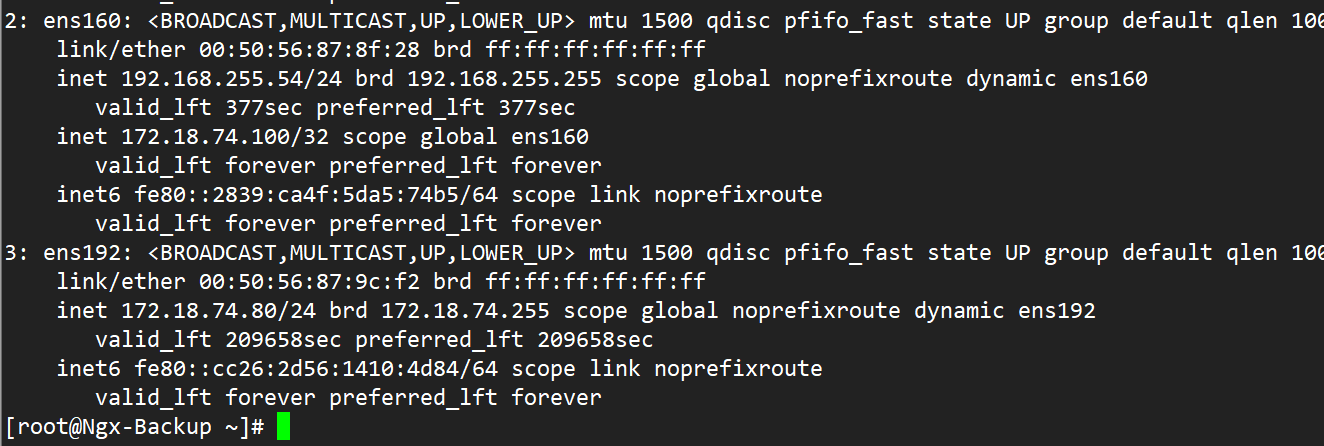
重启网卡后,vip回归到Master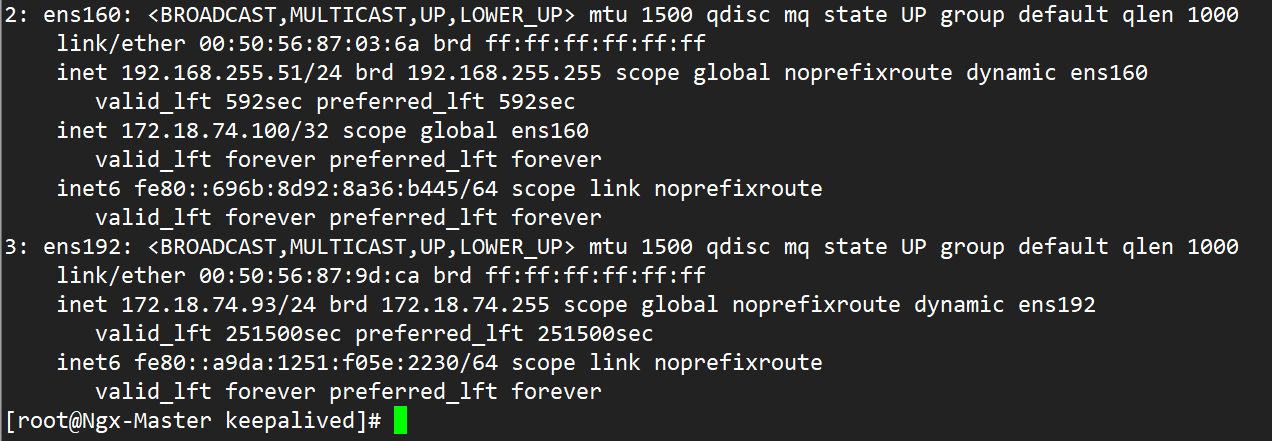
三、web 集群
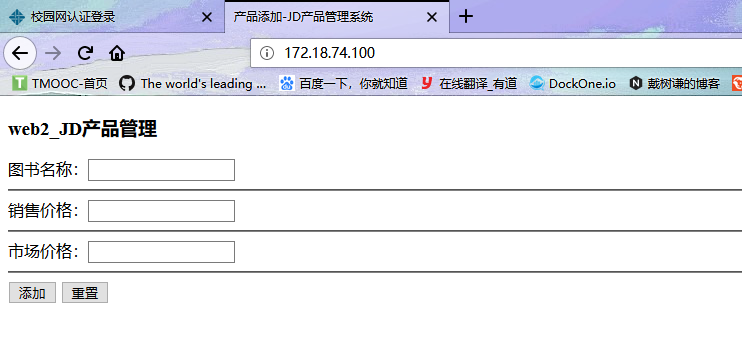
这一部分其实很简单,在安装操作系统的时候我选的”Basic web server”,为了能验证web能提交数据到MySQL,写了一个PHP页面。
在连接数据库的时候,数据库地址是vip:192.168.255.200
1 | index.php |
1 | deal.php |
1 | coon.php |
下面的代码用来测试从数据库读取内容
1 | <?php |
如果两个web服务器中的页面不同,在提交表单的时候回显示无法找到。
最终效果为:
四、nginx高可用集群
nginx version: nginx/1.14.0,keepalived-2.0.7
与第一层原理相同,只不过反向代理的数据库,监听端口是3306
这里也会有一个Vip:192.168.255.200
配置Nginx
1 | nginx.conf |
配置keepalived
1 | keepalived.conf |
vip转移不再演示。
五、mysql双机热备集群
Server version: 5.6.43-log MySQL Community Server
源码安装mysql,不再展开。
mysql1:my.cnf
1 | # For advice on how to change settings please see |
mysql2:my.cnf
1 | # For advice on how to change settings please see |
web想要上传数据到数据库,首先需要使用web登录至数据库,然后MySQL中应当有已经创建好的数据库,库中要有表,用户权限等等。MySQL集群我们做的是双主,数据是同步的。
先配置双主吧,然后只用建一遍库就可以了。双主模型其实就是互为主从,主从同步复制原理分成三步:master将改变记录到二进制日志(binary log)中(这些记录叫做二进制日志事件,binary log events ),slave将master的binary log events拷贝到它的中继日志(relay log),slave重做中继日志中的事件,将改变反映它自己的数据。
首先在两台mysql上创建用户张三 ,允许对方远程连接
1 | grant all privileges on *.* to zhangsan@192.168.255.52(192.168.255.57) identified by '123456'; |
先以MySQL1为主
MySQL1上(192.168.255.52 主):
1 | mysql> show master status; |
MySQL2上(192.168.255.57 从):
1 | mysql> change master to master_host='192.168.255.52',master_port=3306,master_user='zhangsan',master_password='123456',m aster_log_file='mysql-bin.000008',master_log_pos=120; |
再以MySQL2为主
MySQL2上(192.168.255.57 主):
1 | mysql> show master status; |
MySQL1上(192.168.255.52从);
1 | mysql> change master to master_host='192.168.255.57',master_port=3306,master_user='zhangsan',master_password='123456',m aster_log_file='mysql-bin.000006',master_log_pos=120; |
查看状态, Slave_IO_State 为等待主机事件;MySQL1主机显示192.168.255.57(即MySQL2)为主,在MySQL2上查看则相反;Slave_IO_Running: Yes;Slave_SQL_Running: Yes
1 | Mysql 1 : |
1 | MySQL 2: |
创建数据库
创建db-jd数据库,在库中创建tb_goods表,表中字段与PHP网页相对应,在mysql1中创建,mysql2中同步
1 | mysql> create database db_jd; |
授权允许web登陆
在两台MySQL服务器上创建web用户,允许远程登陆,并赋予db_jd数据库的权限1
2
3
4
5
6
7
8mysql> create user web@192.168.255.50 identified by '123456';
Query OK, 0 rows affected (0.37 sec)
mysql> grant all privileges on db_jd.* to web@192.168.255.50;
Query OK, 0 rows affected (0.12 sec)
mysql> create user web@192.168.255.53 identified by '123456';
Query OK, 0 rows affected (0.37 sec)
mysql> grant all privileges on db_jd.* to web@192.168.255.53;
Query OK, 0 rows affected (0.12 sec)
关于为什么不直接将权限赋给VIP,以及给Nginx服务器赋权,我认为归根到底还是web服务器的Apache与MySQL服务器MySQL -server之间通过套接字进行进程间通信,无论是vip还是Nginx只不过是中间的一座连接桥而已,实质上还是Apache与MySQL-Server通信。
在web插入数据进行测试,如下是在web1界面添加数据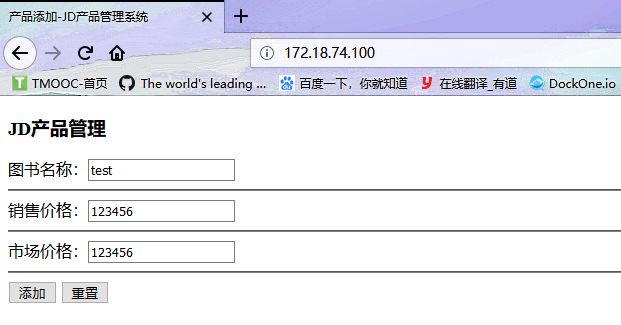

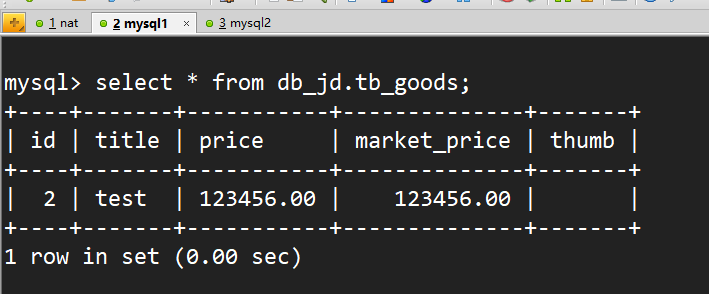
mysql1中可以看到插入的数据test
mysql2中同样有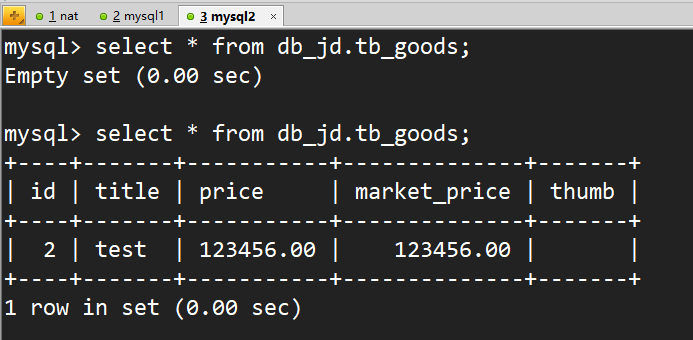
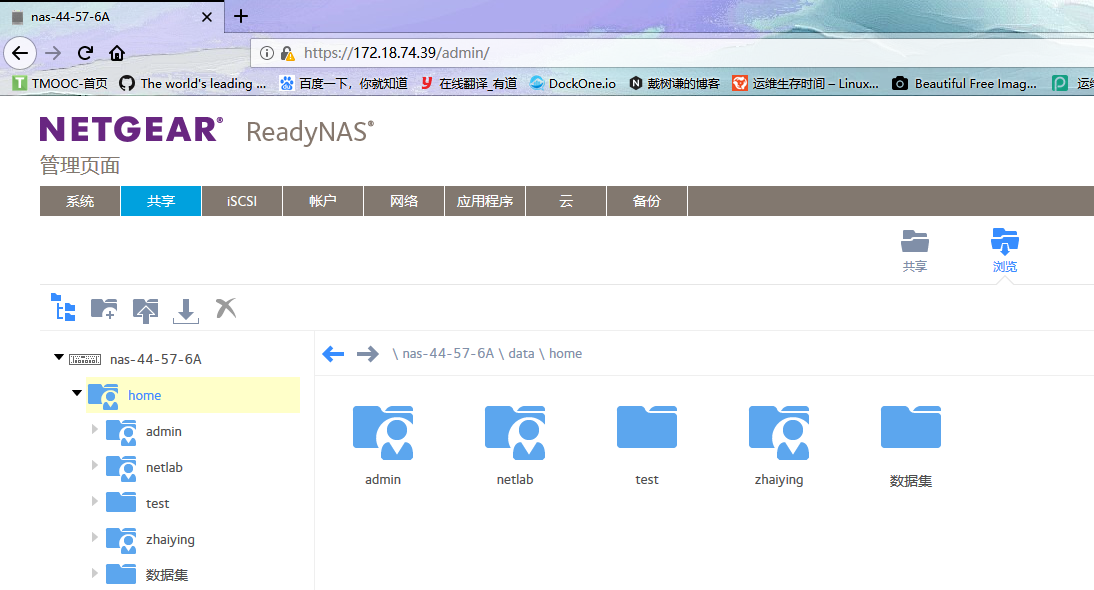
六、网络链接NAS存储
输入ip访问NAS服务器的web页面,然后将nas中已经存在的文件夹挂载到mysql服务器的数据目录下即可。
使用mount挂载后,格式化了mysql数据目录下的文件,很郁闷,建议先挂载后再去安装mysql。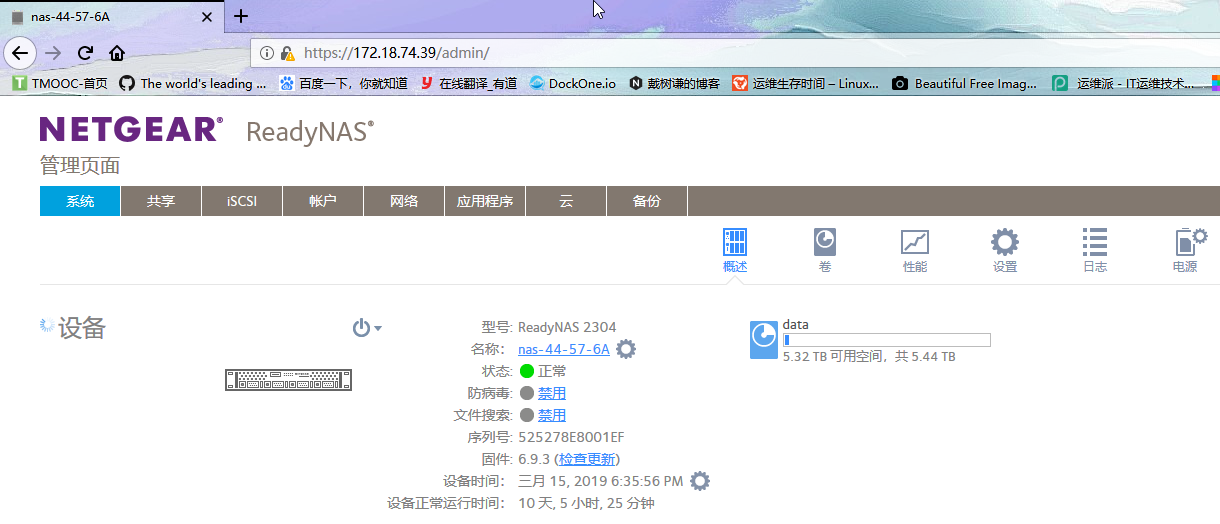
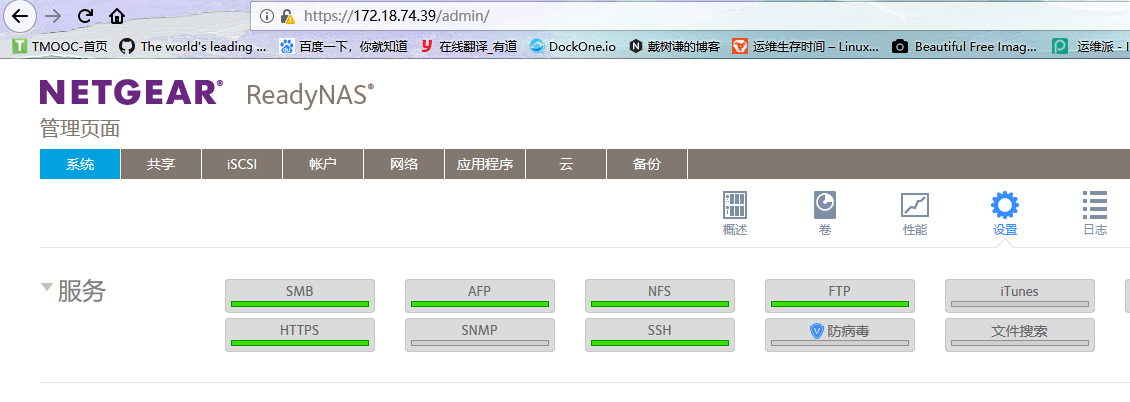
在NAS上开启NFS协议(NetworkFileSystem)。自带数据备份操作很简单。
1 | mount -t nfs -o nolock 172.18.74.39:/home/admin /var/lib/mysql |